Monday 18 July 2011

Vegetable Tempura- Quick, easy and extremely delicious!

Tempura is one of the most well known dishes outside of Japan besides sushi and although looking very delicate and complicated, is very very easy to prepare. Tempura is great as a light meal, or for a dinner party. Let's wow your friends and family with your Japanese culinary skills! (but only we know how easy it will be :) )


What is not well known about this dish is that this so-called Japanese dish was introduced by Spanish and Portuguese missionaries during the sixteenth century. Like many foods adopted by the Japanese, Tempura has been tweaked to suit their palate and it has passed so thoroughly into native cooking that its origin is almost forgotten.

When cooking tempura there are three essentials:
1. Fresh ingrediants
2. Oil at a constant temperature
3. Lumpy batter.....(don't worry, I'll elaborate more on this)

Using fresh meat, fish and vegetables is a given really, while keeping the oil at a consistent temperature allows for even and light cooking.

The lumpy batter, although sounds odd as we tend to make batters as smooth as possible, allows for a crisper, lighter coating.
With Tempura the goal is a lacy, golden effect with the deep fried coating, not a thick coating of pancake mix.

To achieve this, prepare the batter just before you are ready to begin deep-frying and do not let the batter stand for too long.
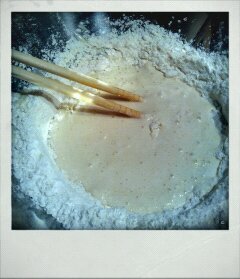
Tempura batter should not be smooth and velvety. It should only be loosely blended together (with chopsticks, which are not an effective tool for mixing and hence the perfect utensil for this job!) Fantastic!

A good Tempura batter should have a ring of flour around the sides of a mixing bowl and a mixture marked with lumps of dry flour.


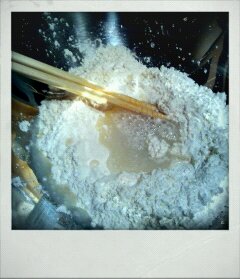
Special Tempura flour with a well of ice water
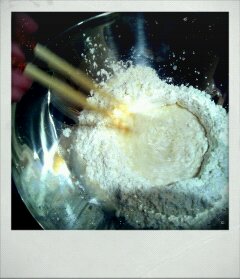
Mix briefly using chopsticks
Use less water for a thicker coating


 Now! Time for some ingredients!

Serves 4

2 medium onions cut lengthways. Pierce with toothpicks then cut into rounds to keep rounds from falling apart.
4-5 inches lotus root, scraped and sliced into rounds.
8-10 mushrooms (I used oyster, but shiitake or white mushrooms work well too) wiped and trimmed
1 small aubergine, cut into 1/4 inch thick slices on the diagonal
1 small green pepper, cut lengthways into quarters
1 batch Tempura batter
Vegetable oil for deep-frying
60ml sesame oil

Note: White fish, such as whiting or pollack, king prawns and squid are highly recommended for Tempura as they are light and cook quickly. Chicken is also a good addition to Tempura, but make sure it is thinly sliced so its cooks thoroughly.

Tempura Batter
500ml iced water (I sit the jug in the freezer an hour before I begin cooking)
45g potato starch, sifted
140g plain flour, sifted
1/4 tsp baking powder
1/4 tsp salt

Mix dry ingredients together and add small amounts of water to get correct consistency before frying.
Make a second batch if needed.

Note: In my cooking, I used a special Tempura flour which can be found in most Asian food stores and makes the process even easier.


Tempura is best served with a dipping sauce
Dipping Sauce
250ml dashi stock (for vegetarians/vegans, a kombu and shiitake mix works just as well.)
80ml mirin
80ml light soy sauce
2 tsps finely grated root ginger

Prepare the dipping sauce by combining dashi, mirin and soy over heat. Bring to a boil and reduce heat. Keep warm until serving.

Deep-frying Method
1. Prepare the vegetables (and fish or chicken if using). Cover with clingfilm and refrigerate until needed.
2. Fill a heavy based saucepan one third full of vegetable oil and add the sesame oil.
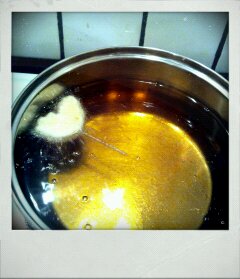
3. Heat to 180C. Test by dropping a tiny bit of batter into the oil; it should sink slightly and the be buoyed up to the surface with the oil gently bubbling around its edges.

(Just a reminder, this is hot oil so please be cautious and avoid splashing and high heat. On my electric cooker, I move between 3 and 4 on the dial) But this is just a guideline. If nervous have a safety blanket nearby.

4. Make a batch of batter and starting with the onion, quickly dip into the batter-allowing any excess to drip off- and then lower into the oil.

Fry for 2-3 minutes, or until the batter is a golden, crispy colour.

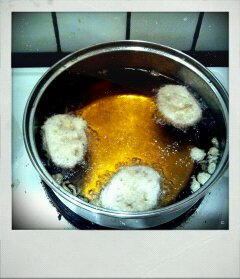
Cook 2-3 pieces at any one time.

5. Drain on paper towels and keep warm in a low heated oven.
6. Continue with the rest of the vegetables while making sure the oil temperature doesn't drop. (check using above method)
7. If using fish or prawns, allow 1-2 minutes cooking time. With chicken, allow for 2-3 minutes and if unsure, cut one piece open to see if there is no pink.

To Serve

Serve the cooked Tempura on a large platter for all to take as they please along with bowls of hot rice.

All for meeee....nom nom nom!


At the table, pour the hot dipping sauce into a small bowl and mix in the grated ginger.
Dip Tempura in this sauce and eat.
Simple as that.

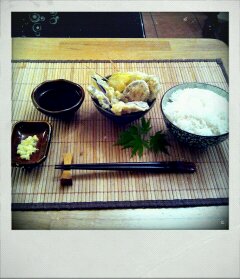
From L to R: Grated ginger, dipping sauce, selection of Tempura and rice.

いただきます!!


Tuesday 12 July 2011

Hint of sunshine? Break out the Mugicha! (Barley tea)

As the title suggests, the weather today in Cork was one of sunshine! Something that is hungered for by the UV deprived nation. 

Seeing it was such a hot and beautiful day, a post about refreshingly chilled mugicha (barley tea) was needed. When I went to work in Japan August last year it was roasting! I had never experienced heat like it. 38degrees everyday, high humidity and extreme amounts of sweating (not pleasant). This made worse by being suited up all day long (even more unpleasant), trying not to melt. Us Irish people really can't handle heat too well....

But thankfully there was glorious chilled relief available in the staff room; mugicha.


Mugicha is made with roasted barley grains and is hugely popular during the summer months in Japan and Korea. Mugicha can also be enjoyed cold in the summer and hot in the winter, but I personally prefer drinking it cold.

Mugicha is caffeine free. Its colour ranges from pale to dark brown and has a roasted taste with an earthy undertone. My partner in crime abhors the stuff and likens it to "nasty cold coffee". I adore it and will happily drink it all day long-even when its not sunny outside!

There are a few different ways to prepare mugicha and all of them involve bulk production. If you're making it, it is best to make it in large volumes.

The teabags I have are a 'hybrid' type where they can be used in boiling water or cold water for the same effect. 


The method I use most is the hot water one. I boil around 2 litres of water, throw in the tea bag and allow the flavour to develop over a few minutes. I then leave the water to cool, bottle it and pop it in the fridge.

The cold water method where the teabag is left in a jug of water in the fridge anywhere from 40 minutes to 1 day, depending on how strong you like your tea.

The large teabags can be used twice, so don't throw it away too quickly!
As health benefits go, I haven't found any solid scientific research in the area of barley tea. However, I've gleaned bits and pieces from other sites.

Mugicha's top health benefits are that its caffeine free, filled with antioxidants and poly-phenols which aid the heart and general well being. It is also high in copper which apparently lessens the effects of grey hairs...(might come in handy down the line).

A good friend told me when he asked his companies tea lady which was the best way to make mugicha, she recommended using the hot water method as it released the antioxidants and goodness! I took that on board straight away. They know their stuff!

In Japan mugicha is very reasonably priced. A pack of 50 large teabags cos me about ¥300 or €2.60!
The best and most convenient place I've seen to purchase mugicha is on the Japan Centre website- http://www.japancentre.com/items/855

If I find anything local, it shall be known to you all.

So on a warm day break out the barley tea and enjoy the cold and earthy flavours!


いただきます!! (Itadakimasu- Let's eat; I humbly receive-preferably with my feet up, sunglasses and a book)

Curry Udon

Today I decided to crack out an old favourite; Curry Udon.


While living in Japan, there were some days where you wouldn't go out and eat in the beautifully tasty and beautifully cheap restaurants. Usually due to a bad weather, very very little money or that need to be creative...and what better place then the kitchen. On such occasions, one would just go to their local Japanese supermarket and pick up a pre made curry kit of carrots, onions and potatoes, similar to Ireland's stew kits found in Dunnes Stores.

This recipe is great because you can use any left over vegetables and it will still taste amazing.

It is very straight forward and will make a huge batch, so plenty for lunch the next day, for seconds...and sometimes thirds. :)

So, let's get to it!


Serves 3-4
200g pork (I used pork neck, but any cut of pork will work for this)
2 small potatoes, cubed
1 onion, sliced in half and again into thin slices
1 carrot, cut in half lengthways, then cut into slices
3-4 chinese cabbage leaves finely chopped (optional)
1/2 pack Japanese curry roux(I used House Vermont Curry with apple and honey)
500ml dashi stock, using instant dashi
3-4 packs of vacuum sealed udon noodles (dried noodles will also work well with this recipe)
200ml boiling water
2 scallions, finely chopped to garnish
pickles, to serve (fukujinzuke pickles are most common with Japanese curry http://www.japancentre.com/items/1217)


Method.

1. Freeze the pork for 3 hours, or until partially frozen. Using a sharp knife, thinly slice the pork into 5cm pieces.

Freezing the meat makes it easier to slice thinly
2. Heat 1tbsp oil in a pan and gently fry the onions, carrots and potato for 3 minutes. Transfer to the dashi stock.

3. Add another 1tbsp oil to the pan and fry the thinly sliced pork in batches until just brown. Add to vegetable and dashi stock.

4. Allow the dashi to simmer for 10 minutes over a medium-low heat. This fully cooks the meat and vegetables while allowing the flavours to infuse. (skim off any scum that surfaces from the pork)

5. Add the curry roux 2 cubes at a time, allowing for them to dissolve and thicken the mixture. Slowly add 200ml boiling water to the curry mixture until you get the preferred consistency

Add boiling water in small amounts to avoid making the curry watery


6. Add the udon packets and gently break apart with chopsticks. Simmer for another 3-4 minutes.


7. Serve in deep bowls and garnish with chopped scallions. A small saucer of pickles on the side makes a nice addition, but not 100% necessary (it's going to taste brilliant even without them!)


いただきます!! (Itadakimasu- Let's eat; I humbly receive)

Friday 8 July 2011

Gyoza...oh so good!

As my first proper food post I think it will have to be my all time favourite "Japanese" food; Gyoza.


Gyoza is originally a Chinese dish but it has become increasingly popular in Japan. A basic gyoza recipe usually consists of ground meat (largely pork, but minced chicken works too), and/or a vegetable filling wrapped in a thin wheat flour dough.

These are then fried until brown on the bottom and then steamed till the skins are cooked. Most gyoza is served with a soy, mirin and chili oil dip.

Gyoza are largely found in ramen restaurants and make a great accompaniment to the noodly brothy goodness.
 
Living in Ireland can present minor difficulties when trying to track down certain ingredients, which I discovered when looking for the wheat flour skins to make these dumplings. I came across some when in Dublin, but thankfully I found that some are supplied in Asian stores in Cork. However, I would recommend getting a Japanese brand of gyoza skin as they are thinner then the Chinese equivalent (I think the thicker skins are used when making dim sum and other types of dumpling).

This recipe usually makes over 40 gyoza, so you may need to buy more then one pack of gyoza skins. One packs contains about 30-35 skins depending on the brand.

The ingredients are very simple and little work is needed when preparing the filling, its making the gyoza that is time consuming.

So here is what we need!


200g (7oz) Chinese cabbage, stems removed and finely chopped
200g (7oz) Minced pork (Substitute Shitake mushrooms for a vegetarian option)
2 Tsp finely grated ginger
3 Garlic cloves, crushed
2 Tsps Sake
2 Tsps Mirin (Japanese rice wine)
1.5 Tbsp Soy sauce
1 Small leek (or 2 spring onions) finely chopped
1/2 Tsp white pepper
1-2 packs gyoza wrappers


Method

1. Put cabbage in a colander and sprinkle with salt and stand for 20 minutes (This extracts the excess water from the cabbage). Squeeze well and mix with the other ingredients.

2. To fill the wrappers there are two options available. Firstly is this absolutely amazing gyoza shaping device! http://www.japancentre.com/items/2875
This little guy is a plastic circle on which you sit your gyoza skin. 


 Using the spoon provided, place about a teaspoon sized piece of filling into the centre.


Wet one half with a small bit of water and press together. And voila! A gyoza ready to go!

The second method is very much a more hand on approach whereby you sit the gyoza skin on the palm of your hand and place a teaspoon of filling in the centre, similar to the former method.

Wet half the skin and then fold the skin to create a semi circle, making sure to press firmly together. Now, the tricky bit.

Gently pinch the edges of the semi circle to create a pleat. Don't worry too much if it goes a bit funny, I still can't get it right!
And once again, voila! Done!

Heat some oil in a large non-stick frying pan over a medium heat. Place the gyoza flat side down in a single layer (I put between 5-7 per batch, depending on how hungry I am). Cook for about 2-3 minutes until crisp and golden. (Longer if you like a darker brown colour)


Add 40mls of water to the pan and cover with a lid and reduce the heat. Cook for another 5 minutes or until the skins seem slightly translucent. Remove the lid and turn up the heat until all the water has evaporated.

To serve, drain on a little kitchen paper and lay golden side up on a plate with the dipping sauce.

Dipping Sauce: 30mls Soy sauce
                        1 Tbsp mirin
                        1 Tsp chilli oil
Mix all ingredients together and divide between smaller dipping saucers.


Then prepare for absolute gyoza heaven!

Any extra gyoza can be frozen for use later on. I'd advise to tray-freeze the dumplings (they tend to stick together and then become quite a mess when trying to separate them again...personal experience led to the loss of many gyoza...sad times!)

Although it is a bit of a task to make so many dumplings at the one time, the process pays off in a big way.
This recipe I've given is the closest to authentic I have come up with and far surpasses what you may find in chain Japanese restaurants *cough*Wagamama*cough*.

Also bulk making the gyoza is very cost effective. Gyoza can range from €3-8 for 3-5 dumplings..... >o<
I have very roughly priced this at around €6.50 for all fresh ingredients with the condiments being extra, but once you have them, they will last a while.

Pretty much a bargin and freshly made by you! What could be better!

いただきます!! (Itadakimasu- Let's eat; I humbly receive)

New Beginnings

Right so! Where to begin!

Very briefly, I love Japan and everything to do with it (sounds simple eh?)

Last August I got an opportunity to live and work in a town outside of Nagoya called Kasugai as an English teacher. I stayed in Japan for seven months and got to experience the everyday life of "small town" Japan (Kasugai's population was about 300,000 people o_O). I had the pleasure to teach in three primary schools of 6-12 year old's and everyday I ate school lunch with them. It was here that I experienced everyday food that was eaten in households all over Japan. And boy was it diverse and so so healthy!


Luckily in my favourite school, the head teacher Murakami sensei keeps a very up to date blog of the school life. There you can also see what the lunch is every day.

http://www.kasugai.ed.jp/kasugai-e/

(Please note that when posting, the images were down on the site. I hope it will be fixed soon as I miss looking at how the school is progressing through the year)


The one thing that stuck with me was the amazing fresh food. Just amazing. It would put many places in Ireland to shame.

Since returning to Cork, I greatly miss these flavours and diversity so over the last couple of months-much to the delight of my boyfriend- I have been cooking lots of different things. And this is what this blog is about. My memories and experiments with food.


I hope you will read, enjoy, laugh and learn about how amazing Japanese food and culture is and how diverse their food culture is.